|
Visible Analyst FAQ's |
We have created a number of "How To..." training videos to assist users to learn and use the Visible Analyst. Each video explores a specific function or resolves a user issue, and helps you get started using and understanding the Visible Analyst. Additional videos will be added as necessary. If you have a suggestion for a "How To..." video, send us an e-mail at eLearning@visiblesystemscorp.com .
Educational Users
Q. When installing the Visible Analyst educational edition, the install program does not accept the serial number.
A. This serial number, included on the inside front cover of the Visible Analyst Tutorial booklet as well as with the product CD, should be entered using upper case letters including the dashes such as EVSS-0123012345-000. Educational users should choose to install the third installation option displayed on the product installation screen "Visible Analyst Educational Edition".
Q. When I try to create a new project, this message is displayed: "The maximum number of projects have already been created."
A. The Visible Analyst educational edition allows up to 2 projects, one of which has to be the TEST tutorial project. Despite this limitation, the user can still create other projects.
First, for the existing project (other than TEST), users should use the Tools | Backup feature to create a backup file set of this project, and write the backup files to a floppy drive or to an existing folder on the hard drive.
Second, choose the Tools | Delete project to delete the project files and remove the project from the project master file.
Finally, after this action completes, the users can create a new project via the File | New Project menu item, or restore a project already backed up via the Tools | Restore menu item.
Q. Instead of using the Tools | Delete Project feature to delete the project, I just deleted the project folder, and I cannot create a new project. What do I do?
A. Users should always use the Tools | Delete Project feature to delete projects so that the project files are deleted and the project is removed from the project master file. To remove the project from the project master file, select File | Select Project, click on the name of the project to be removed, and click the <ALT> + R keys on the keyboard at the same time. When prompted to remove the project from the project master file, click Yes.
Commercial Users Frequently Asked Questions
Users should access the on-line Help system for additional information about procedures like the ones described below.
Q. How do I import AS/400 DDS, and how can I automatically generate relationships?
A. The Visible Analyst is able to import AS/400 DDS files and automatically generate diagrams based on the imported tables. While the primary keys are imported as part of the DDS, no foreign key information is imported. The Visible Analyst uses the foreign keys to determine the relationship between tables, and includes these relationships on the diagram.
The Visible Analyst is able to infer foreign keys, based on the same named primary key column(s) location in other tables. This foreign key inferencing is associated with the SQL DDL import, rather than the AS/400 import. This foreign key inferencing capability is planned for the AS/400 import, but no time frame has been determined when this capability will be available. However, you can import the AS/400 DDS, generate a SQL DDL file, and then re-import the DDL file and have the Visible Analyst infer the foreign keys. To perform this action, proceed as follows:
- Create a new Visible Analyst project.
- Select Options | DDS Name Translation, and choose the name translation most applicable to your environment. This selection allows you to tailor how object names are generated during AS/400 Data Description Specification (DDS) Generation and how they are mapped to Visible Analyst object names during DDS Import. The on-line Help system describes these options in greater detail.
- Select Tools | Import, set the File of Type to AS/400 DDS, and import the DDS files. NOTE: If reference files are used to store the attribute information, first import the table definition files, and then import the reference files. This procedure will populate the tables in the Visible Analyst with the corresponding attribute information.
- Select Options | SQL Dialect, and choose XDB as the SQL dialect. This dialect most closely corresponds to the AS/400 data types.
- Select Tools | Generate SQL or Generate Database Schema. (The option name was changed in v7.3 from Generate SQL to Generate Database Schema.)
- Generate the SQL DDL for the entire repository, maintaining the default DDL options on the SQL generation dialog box.
- When the DDL is displayed on the screen, click the Save button to save the DDL. The file will be saved in the Visible Analyst TRANS directory (the default directory) and you should use the .SQL or .DDL extension for the file. Close the SQL DDL generation dialog box.
- Select Tools | Import, choose SQL as the File of Type, click the Infer Foreign keys checkbox, point and click to the saved file in the TRANS directory, and click OK.
- When the Import Overlap list is displayed, choose the Import button to continue the import.
When the import completes, the Visible Analyst will have inferred the foreign keys and generated relationships, which can be included on any automatically generated diagrams.
Select File | New Diagram, and choose the entities and relationships to be included on the diagram. The entities will be listed in the dialog box left justified, while the relationships are indented a tab space under the entity name. Selecting a relationship in this dialog box will automatically include the entities on either end of the relationship. Once you have selected the entities and relationships, click the OK button to generate the diagram.
[ Return to Topic List ]
Q. How can I transfer information from EasyCASE into the Visible Analyst?
The latest version of the EasyCASE to VA migration utility can be downloaded from our ftp site at the following address:
ftp://ftp.visiblesystemscorp.com/public/misc/ec2vapmu/
Download the file "ec2vaset.exe" to a temporary directory, and run the file to install the EasyCASE to Visible Analyst migration utility program into the EasyCASE installation directory. The migration program uses some EasyCASE files during the migration procedure.
- Start the migration program, point and click to the location of the EasyCASE project directory, and click OK. The migration program creates a VSC file with the .AD extension in the EasyCASE project directory.
- Start the Visible Analyst, and create a new project using the same rules used when you created the EasyCASE project, Gane/Sarson, Metrica, etc. This information is listed as part of the EasyCASE Project Preferences information.
- In the new Visible Analyst project select Tools | Import, choose VSC as the import File of Type, point and click to the location of the generated .AD file in the EasyCASE project directory, and click OK.
- The EasyCASE project information, including the diagrams, will be imported into the Visible Analyst. You can view the imported diagrams by selecting File | Open Diagram in the Visible Analyst.
NOTES:
1. If the EasyCASE project was created with duplicate object label names enabled, the duplicate labels are NOT imported into the Visible Analyst. The Visible Analyst adheres to the methodology specifications, which do not allow duplicate process names within the same project. Also, the Visible Analyst does not allow an entity to appear on the same diagram more than once.
2. The Visible Analyst does not support all of the diagrams supported by EasyCASE. Those diagrams not supported are not imported into the Visible Analyst.
3. The EasyCASE migration program is intended to be used with version 4.2x of EasyCASE, and cannot be accessed using earlier versions of EasyCASE. Contact the Visible Systems Corporation sales department at sales@visiblesystemscorp.com for upgrade and update information.
[ Return to Topic List ]
Q. What is the procedure to reverse engineer a database into the Visible Analyst?
A. Below is an explanation of the reverse engineer / import procedure. MS SQLServer is the database used in this example, but the same import capabilities are available for Oracle, DB/2, Informix, etc. This import can be accomplished using one of 2 procedures:
- Connect to the database via an ODBC driver
- Import a generated SQL script
Direct ODBC connection
In order for this procedure to succeed, it is necessary that the MS SQLServer ODBC DSN be created on the local PC, which is used to connect to MS SQLServer. Because the ODBC driver does not support all of the information that can be reverse engineered by the Visible Analyst, we added additional capabilities to import the triggers, stored procedures, check constraints, etc. We suggest clients' import into a new project, but you can import into the existing TEST project if you so choose.
Create an ODBC DSN if one does not already exist:
- Select Start | Settings | Control Panel on your computer, and open the ODBC Data Source Administrator. Listed in the ODBC Administrator Driver's tab page should be a Microsoft SQLServer ODBC driver.
- Click the User DSN tab on the ODBC Administrator dialog box, and click the Add button, select the SQLServer driver, and click the Finish button.
- On the next dialog boxes, enter the appropriate information to connect to the Microsoft SQLServer database.
- Exit the ODBC Administrator.
In the Visible Analyst, select Tools | Import, choose MS SQLServer as the Dialect, RDBMS Catalog as the Files of Type, and click OK.
NOTE: The Visible Analyst uses the foreign key information to create the relationship entries in the Visible repository. If no foreign key information is included in the table definitions, the Visible Analyst can Infer the Foreign Keys when you click the Infer Foreign Keys checkbox on the Tools | Import dialog box. Based on the primary key label and the use of these same named columns in other tables, the Visible Analyst will infer foreign key relationships between the parent and child tables.
The Visible Analyst then prompts the user to select an ODBC DSN, connect to the database, and display a list of highlighted tables and/or views selected for the import. To import all of these items, click OK. Otherwise, click on the individual objects to include them in the import procedure.
The Visible Analyst will read the system catalog tables, and import the tables, columns, database views, domains, and check constraints, etc., into the Visible Analyst repository. The import procedure includes an analysis of the database information to determine if there are errors, such as "Entity XXX has no primary key defined". When this analysis dialog box is displayed, you have the option to cancel the import if the wrong database was selected. To continue the import, click the Import button. If an object already exists in the current project, the import procedure will display an Overlap report detailing the names of the objects in the import file that overlap with existing repository entries. Click the Import button on this screen to continue the import, overwriting the existing repository information, or click the Cancel button to cancel the import maintaining the integrity of the existing repository definitions.
Once the import completes, the user is prompted to create a diagram containing the imported information. Clicking Yes at this message box displays a list of the tables, views, and relationships imported into the repository, allowing the user to choose which objects will be included on the diagram. The relationships are indented a tab space, and selecting a relationship automatically selects both entities on either end of the relationship. This dialog box can again be displayed when selecting the File | View of Data Model | New menu item, allowing users to create additional subset diagrams of the data model.
Import a SQL Script
In the Visible Analyst, select Tools | Import, choose MS SQLServer as the Dialect, SQL as the Files of Type, point and click to the location of the script file, and click OK. The script will be imported as described above. The analysis and overlap reports are again displayed and the prompt to create a new diagram will again be displayed.
Additional information about the reverse engineering and import capabilities is explained in the on-line Help system topic Import. Additionally, you can click the F1 key at any time to access the on-line Help system.
[ Return to Topic List ]
Q. Explain user security levels, assigning users to divisions and projects containing divisions.
A. The Visible Analyst user rights specifications discussed below are appropriate for the multi-user network edition of the Visible Analyst. For information about security in the single user version of the Visible Analyst, read the on-line help topic "Security in Single-User Visible Analyst".
When a user creates a Visible Analyst project, that user automatically becomes the Manager of the project as displayed in the File | Project History dialog box. This user has complete access to the project, including assigning other users access to a project via the File | Modify User List menu item and viewing all divisions in the Repository | Divisions dialog box and assigning other users Division rights.
System Managers
Users created at the System Manager security level are in effect administrators of the Visible Analyst and have the following capabilities:
Create and delete projects; add and delete users; add or remove passwords; add or remove users group membership; assign and remove users access to a project; define users access rights to a project; change the Manager of a project; view all divisions in the project; assign and remove users division rights.
Project Managers
Project Managers can create projects and delete the projects they create. When a Project Manager creates a project, their Visible Analyst logon id is entered into the Manager field of the File | Project history dialog box. As the Manager of a project, they can: assign and remove users access to a project; define users access rights to a project; view all divisions in the project; assign and remove users division rights.
Project Managers cannot access projects created by other users unless the Manager of the project or a System Manager level user assigns them access to a project. Once assigned to a project, a Project Manager's access and edit rights to a project can be limited under the File | Modify User List | Modify rights menu item.
Users
Users cannot create or delete projects; they must be assigned rights to a project by the Manager of the project or a System Manager level user; once assigned to a project, a Users access and edit rights to a project can be limited under the File | Modify User List | Modify rights menu item.
NOTE: A System Manager level user can assign a User as the Manager of a project via the File | Project History menu item. When a User is the Manager of the project, the User can add and remove users; assign project access rights; view and assign division rights; and delete the project.
Divisions
Before a user can be assigned access to a division, they first must be assigned access to the project, unless they are a System Manager or the Manager of the project. This is also true for the Enterprise or Satellite projects. The Division rights assigned to a user are somewhat secondary to the project rights assigned to the user.
If an object is in more than one division, and the user (User or Project Manager) is assigned rights to only one of the divisions where that object is used, the user will NOT be able to access the repository entries for that object until the user has rights to ALL divisions where the object is used.
System Managers' access rights to divisions are different. Because these users can access a project without being granted rights to the project, the division rights become more important, determining which objects these users can view and edit.
Some examples:
If the System Manager is NOT assigned rights to the project, they can still access the project. They cannot access and edit any objects in a division, unless assigned rights to the division. If they are provided rights to a division, but not assigned rights to a project, they can access and edit ALL objects in the repository as well as the division.
If the System Manager is assigned Read Only rights to the project, they can still access the project, but all repository objects are marked as Read Only. If they are assigned rights to a division, they can only edit the objects in the division if they have been assigned edit rights for the division.
[ Return to Topic List ]
Q. How can I save diagrams so that they can be used with Word or PowerPoint?
A. Diagrams, or user-selected sections of a Visible Analyst diagram, can be saved as a Windows Metafile or as a JPG file. When a user produces a repository report and marks the checkbox to use the Web browser to preview the report, any diagrams associated with the diagram objects in the report will be generated as JPG files. The HTML report file will maintain hotlinks for the diagram objects, and clicking one of these Location hotlinks will open the associated diagram JPG file in the web browser
Image file generation:
To create a Windows Metafile or JPG for a Visible Analyst diagram, follow this procedure:
- Open a diagram, and click the Edit | Select All menu item to include all objects on the diagram in a bounding box.
- Click Edit | Copy To, enter a name and location where the file will be saved, choose .WMF or .JPG as the File Type and click OK. The saved diagram file can be inserted into a Word document or PowerPoint slide by opening a documents or slide in the specific application, choosing Insert | Picture From File, pointing and clicking to the diagram file, and clicking OK.
NOTE. In the Visible Analyst diagram you can drag the mouse over a number of items, which includes these items in a bounding box. Only these items enclosed within the bounding box will be included in the image file.
[ Return to Topic List ]
Q. How can I generate reports as HTML documents, and the diagrams as JPG files?
A. Select Repository | Reports, choose the report scope and repository objects to include in the report, and click the Preview checkbox located in the top right corner of the Report dialog box. Selecting the Preview button also selects the option to "Use Browser for Preview" button. Click Print, and the HTM file will be opened in the browser. Clicking a diagram objects Location hotlink will open the JPG diagram file associated with the objects diagram location.
[ Return to Topic List ]
Q. How can I export / forward engineer my data model directly to an Access database, or any ODBC compliant database?
A. Modify the procedure below, if necessary, and use it to forward engineer the Visible Analyst generated SQL DDL into any ODBC compliant database. The procedure assumes that MS Access is the target database.
In MS Access:
- Create an empty database.
- Select Tools | Options, and click the checkbox on the View tab to view System Objects.
- Select Tools | Security | User and Group Permissions. On the right hand side of the dialog box, select all of the "Msys…" tables, check the Administer box to enable all of the permissions, and click the Apply button.
- Close MS Access.
Create an ODBC DSN:
- Select Start | Settings | Control Panel on your computer, and open the ODBC Data Source Administrator. Listed in the ODBC Administrator Driver's tab page should be a Microsoft Access ODBC driver. If you do not have this driver, you can add the driver by re-installing Microsoft Access, choosing to install the ODBC driver.
- Click the User DSN tab on the ODBC Administrator dialog box, click the Add button, select the Access driver, and click the Finish button.
- On the next dialog box, enter a name for the ODBC Data Source name, "Access Driver" for example, and click the Select button in the database section of the dialog box. Point and click to the location of the new MS Access database created above and close the ODBC Administrator.
In the Visible Analyst:
- Generate the SQL DDL for the project and click the Catalog button on the generated SQL DDL dialog box.
- In the ODBC Select Data source dialog box, select the ODBC DSN created above and click OK.
- If you are prompted to log into the database, leave the user name and password blank, and click OK.
The Visible Analyst data model tables, columns, relationships, keys, indexes, etc. are forward engineered into the Access database.
[ Return to Topic List ]
Q. What is the import / export procedure to transfer Erwin .ER1 files into / from the Visible Analyst?
A. Importing (ERwin to Visible Analyst)
The procedure is quite simple, but certain applications must be installed in order for the import to succeed.
- ERwin should be loaded on the local PC where the Visible Analyst is installed.
- Users are required to install an ERwin interface application available for download from the Platinum web site. If this ERwin application is not installed, the Visible Advantage Interfaces program displays the following message: "You need to download/install/register ERwin LinkObject API (7.3 MB) from http://ca.com/products/alm/erwin/companion_products/download1.htm If you did install/register ERwin LinkObject, then close the application and run it again)." This interface application is usually installed as a subdirectory of the ERwin installation directory.
In some cases, usually on a Win '95 PC, the LinkObject program is not registered with the PC during the installation procedure, and the import procedure fails when this API is called. To resolve this problem, open the PC's registry, and do a "Find" on "Erwin server". If you do not find any listing, open a DOS window and go to the directory where you installed the ERwin API. Type "c:\windows\system\regsvr32.exe Er2Api32.DLL" and click OK. A message box is displayed indicating the registration was successful.
Open the Visible Analyst, and create a new project. Select Tools | Import, select ERwin as the File of Type, point and click to the location of the .ER1 file, and click OK. The Visible Analyst will then import the .ER1 file, including the ERwin diagrams.
After the import completes, select File | Open Diagram, click the + icon next to the Entity Relationship diagram listing and double click on a diagram name to open the diagram. Double clicking on a diagram object displays the objects repository Define Item screen.
Exporting (Visible Analyst to ERwin)
Open the selected project in the Visible Analyst, choose Tools | Export, select Erwin (.ER1), and click OK. The Erwin .ER1 file will be generated and written to the Visible Analyst TRANS directory.
[ Return to Topic List ]
Q. How do I use the Enabler database as the database engine for a Visible Analyst project instead of Btrieve?
A. Below is the information explaining how to use the Enabler application as the repository engine for a Visible Analyst project. We used Enabler v3.0, SP1 to document this procedure.
Enabler Requirements
- When creating a Visible Analyst Enabler based project, the user should have 100 MB of free space on the drive where Enabler is installed.
- If no Enabler database exists, create an empty Enabler database, and then create a second Enabler database for use as the Visible Analyst's project database. The Visible Analyst can be used create this second Enabler database during the Create Project procedure. There can be a problem with Enabler if the very first database created is used as a Visible Analyst project database.
- The Enabler directories have to be in the path of the client PC.
For each Visible Analyst project created using Enabler as the database engine, an Enabler data store is created to maintain the Visible Analyst project information. The user has to have the necessary Enabler rights to access the Enabler application files and directories, and to be able to create new Enabler data stores.
- Open the Visible Analyst, and select File | New Project.
- Enter a name for the project (limited to 4 or less characters).
- Select the rules and cardinality notation.
- Choose Enabler from the "Repository" field drop down list box, and click OK.
Once the project is created, the project name will be displayed in the bottom right hand corner of the Visible Analyst screen. You are then prompted to create a new diagram, and now have complete functionality of the Visible Analyst. You can see the project information and tables by accessing the Enabler application.
[ Return to Topic List ]
Q. How can I export the Visible Analyst files into a database so I can write my own reports against the Visible Analyst files?
A. The easiest way to write reports against the Visible Analyst project is to use MS Access, but any ODBC complaint database can be used to store the project files. MS Access is used for this example procedure.
- Open MS Access and create an empty database.
- Select Tools | Options, and click the checkbox on the View tab to view System Objects.
- Select Tools | Security | User and Group Permissions. On the right hand side of the dialog box, select all of the "Msys…" tables, check the Administer box to enable all of the permissions, and click the Apply button.
- Close MS Access.
In the Visible Analyst:
- Open the project, and choose Tools | Backup, and backup the project to an existing directory.
- Select Tools | Restore, and change the Database Format to Access on the Restore dialog box.
- Click OK, and OK again on the second Restore dialog box. If necessary, point and click to the Access database file to be used as the project's repository.
When you open the Access database, you will see the Visible Analyst tables and project information. The format of the Analyst tables is described in the Operation Manual, and in the on-line help. It may help if the users also export the project under the Tools | Export | Relational format. The same information that is in Access will be written to the same named files located in the Visible Analyst TRANS directory.
NOTES: No users should be in the Visible Analyst project while the project is open in MS Access. Users may be required to log into the Access database when opening the project in Visible Analyst.
[ Return to Topic List ]
Q. Explanation of Divisions in the Visible Analyst and division dialog box options.
1-a. What is the concept of division SYNCHRONIZATION?
The "Enterprise Copy" feature is really a mechanism used to manage the state of replicated repository definitions. It replaces one repository definition maintained in one project with another definition maintained in a different project. As currently designed, the granularity of blending differences is limited to the object level. In other words, you cannot merge individual object properties to create a composite image. For example, an element X in project Y is derived from element X in project A. The length property of element X in Y is changed while an independent change is applied to the description property of X in A. Currently, there is no automated means of creating a new element X in either project that incorporates both the length (X in Y) and description (X in A) changes. A future Analyst release will permit blending at the more fine-grained property level.
1- b. Is a synchronization propagated in both directions (changes made in the satellite are updated in the main project, and changes made in the main project are updated in the satellite at the same time?) or can I decide which direction to promote my changes (from satellite to main, or from main to satellite, or both at the same time)?
Although you must execute the Enterprise Copy feature from the main (source, base) project to select the desired division and satellite (target, derived) project, you can choose, at the object level to promote changes from either the satellite to main, or from the main to the satellite.
2-a. What is the meaning of "?" and ADVISE labels?
The "?" appearing under the column labeled "Action" on the dialog titled "Select Update Actions" means a decision must be made to determine the survivor for the given object pair. Select a conflict entry in the list box and then press "View Differences…" to examine the contrasting property values. If the surviving object is displayed by the left window, press "Use Source Object" otherwise, press "Use Target Object". Once you have determined the survivor, the "?" in the Action column will be replaced by the either the word "Source" or "Target". Now continue on with the next conflict entry until all entries in the conflict list have been resolved to either "Source" or "Target".
The "Advise?" value stresses caution as either the item exists outside the division being synchronized, or the object has a different type in each project. Be especially cautious in situations involving different object types, as selecting an incompatible type might cause certain composite objects (definitions dependent on other ones) to drop their references to it.
2-b. Did I need to resolve all these conflicts before I proceed?
Yes. All conflicts must be resolved to either "Source" or "Target" before applying any change. In other words, the "OK" button on the dialog titled "Select Update Actions" will become enabled once all the rows in the conflict list have been assigned "Source" or "Target".
3. What is the exactly meaning of TARGET and SOURCE?
These are generic names assigned to the "satellite" and "main" projects respectively.
4-a. Can I promote some changes made in a satellite and delay some others?
Currently, the only method available to partially promote differences involves constructing a "new" division that contains only the repository entries that you wish to synchronize. Essentially, an initial division maintains the derivation linkage between the source and target repository definitions. This derivation linkage can be used to identify discrepancies between the base and derived definitions. Once identified and recorded, a client can decide which definitions they wish to immediately synchronize. The client then creates a new division in the base project and includes only the desired definitions. Finally, the client synchronizes this new division.
There are limitations to this approach. If the repository definition is a composite one: it relies on other repository definitions, then these dependent definitions are included by the conflict analyzer even though these sub-components are not explicitly mentioned in the division. For example, a data element referenced by an entity is automatically included in any division that contains the entity. Therefore, due to these dependencies between definitions, you can't fully isolate (decouple) a change to a given division.
4-b. When I proceed with synchronization, is my satellite project also updated?
Both the Enterprise (Source) and Satellite (Target) definitions are updated according to the value of the "Action" column when the OK button is pressed on the dialog titled "Select Update Actions". In other words, one of these definitions survives and the other non-conforming definition is replaced (updated) to reflect the surviving one.
4-c. When synchronization is completed, do both the main and satellite projects contain the same objects (diagrams, attributes, entities, classes, flows…)?
All definitions included in the synchronized division should be the same.
5-a. Is this a synchronization of both projects?
Same answer as 4-c. However, unless your divisions encompass every definition in both projects, differences will remain between them. Remember, synchronization occurs between divisions, which are potentially limited subsets of the entire contents of both projects.
5-b. Is it possible to promote objects from the satellite to my main project?
Yes. For example, you can implement a promotion process where the enterprise project contains only definitions that are accurate and complete (at least relatively speaking) while the satellite project contains evolving definitions. Once an evolving definition becomes accurate and complete, it can be promoted from the satellite to the enterprise project. Since a satellite project itself can be considered an enterprise project by another project, and there is no encoded limit to the length of this chain, you can implement an n-depth promotion hierarchy.
5-c. Is it like publishing?
Yes. You may consider one or more enterprise projects as authoritative publishers for certain repository definitions. The satellite projects (subscribers), simply subscribe to the published repository definition(s) (divisions) by their inclusion in the division's project membership list (subscription list) maintained by the enterprise project (see listbox labeled "Satellite Projects on This Division:" on the dialog titled "Enterprise Copy").
In fact, in the network version of the Analyst, you can assign a read only access right to the content of a publication (division) to all users other then the ones responsible for its composition.
6-a. To create my satellites copied a diagram to another project (without the enterprise copy). Do you think that I'm going to have problems with synchronization?
It all depends on how much change occurs before you perform your first synchronization. If you created a division and performed an "Enterprise Copy" before applying any change, then there shouldn't be any problems. Even in the situation where changes have been applied before the first successful synchronization, it should generally "work" as long as the definition's name or type hasn't changed. Performing an "Enterprise Copy" (a.k.a. synchronization) simply encodes some information into the satellite project to assist the comparison agent so it continues to match entries when either their names or types change.
Besides the information presented above, the Analyst's Help system explains the use of the "Enterprise Copy" feature. To, access this information:
- Select "Tools | Enterprise Copy…". The dialog titled "Enterprise Copy" should appear.
- Press the "F1" key. This should invoke Help and display information discussing "Enterprise Copy" screen.
- Press "<<" or ">>" at the top of the Help screen to view related information.
[ Return to Topic List ]
Q. How can I denormalize a logical model?
A. When designing a logical data model, you want to show all important relationships between entities. However, when deploying a database based on that model, you may not want to implement those relationships for performance reasons. Visible Analyst allows you define the relationship in the logical model, but suppress that relationship when generating your database schema. This does not mean throwing the relationship away, but combining information from two entities in your logical model into a single table in your database.
 Open your logical data model. Open your logical data model.
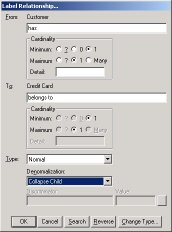
- Click the right mouse button on the relationship to be denormalized and choose Change Item .
- Near the bottom of the dialog box, choose the desired denormalization option. None indicates the tables should not be altered during schema generation. Collapse Child indicates the child columns should be added to the parent table. (If a supertype /subtype relationship is used, a discriminator should be specified.) Duplicate Parent indicates the columns in the parent table should be added to the child table, and the parent table should not be generated, while Duplicate Parent and Retain indicates the parent should be generated. In general, you will choose the collapse child option.
When combining tables that are joined with a relationship that has a cardinality greater than one, you need to specify how many occurrences of the child columns will appear in the parent table. For example, one of your business rules may state that a customer can have only three telephone numbers.
- Double-click on the relationship to be denormalized and click on the Cardinality tab.
- In the Detail field, enter the number of occurrences.
- Click on the Foreign Key tab and then click on the Cardinality sub-tab.
- For each set of columns, enter a prefix that will be used to uniquely identify the columns. If you would rather use a suffix, click on Suffix instead of Prefix .
|